With entrenched muck, algae and black streaks to tackle, cleaning a motorhome is a task that is never likely to top anyone’s list of favourite activities. However, it’s an important job to carry out, not only to keep your ‘van looking its best, but to also make your life easier if you decide you want to sell it.
If you’re dreading the prospect of tackling the grime on your ‘van, the good news is I’m here to help. With all of my motorhome cleaning experience, and having tried out a vast number of products over the years, I have plenty of advice on techniques and choosing the items that will help, such as the best motorhome cleaners and the best motorhome polish.
In this guide, I’m sharing my nine-step guide to achieving a sparkling motorhome for the upcoming season of touring, as well as answering some of the common questions that come up with motorhome cleaning, such as how often it should be done and whether you start with the roof or work your way up.
Do remember to check the application instructions of any product you intend to use before applying it though.
Practical Motorhome is supported by its audience. When you purchase through links on our site, we may earn an affiliate commission. Learn more.
How to clean a motorhome:
How to clean a motorhome roof
Cleaning the motorhome walls
Cleaning a motorhome’s decals and graphics
Treating the chalky glass fibre
Clean the seals
Cleaning the windows
Cleaning the wheels
Clean and protect the tyres
Furnishings and upholstery in your motorhome
Cleaning a motorhome – a step-by-step guide:
1. How to clean a motorhome roof
Whether you clean your motorhome from top to bottom or bottom to top is entirely up to you, but it’s the cause of much heated debate on touring forums.
Personally, I feel working from the roof down is the most sensible option. That’s because working this way, the water from the top runs down and softens the dirt on the panels below before you get to them.
Surely working upwards merely sends dirty water flowing downwards over the areas of the panel you’ve just cleaned, requiring a further rinse off, before you finish? In addition, motorhome roofs are often the dirtiest part of the vehicle, so in my opinion it’s good to get that area out of the way first.

So, I start with the motorhome roof cleaning. At home, I use my tall Henchman stepladder (which has flared legs and is super-stable) for access.
If you use a standard ladder leaning against your ’van, first make sure it’s extremely stable, and protect the edge of the roof with an old towel, some foam or similar (pipe-insulating foam tubes with a split down one side are ideal).
The most important point here, though, is your safety, so take every precaution to avoid falls before you start cleaning. A product such as Slip Stop is highly recommended.
To begin, soak the roof. Now, with a soapy detergent mix and a soft brush, start loosening the grime on the roof, focusing on the areas which attract the most dirt, such as the vents, the solar panels and the edges of the rooflight.
Avoid grinding into the roof surface – this will cause micro-abrasions. Instead, use plenty of water to wash the grime off.
In my opinion, cleaning around the seals on rooflight trims is going to be the most difficult job, because lichen and grime gather there. If you’re after a 100%-clean finish, you might need to get into these areas with a toothbrush, nail brush or scrubbing brush, but do take care not to damage the surfaces, and remember to wash away any strong cleaning chemicals.
You can walk on some motorhome roofs, but I wouldn’t recommend it. If you plan to do so, check with the ’van manufacturer if it is possible, and if so, where you should walk.
I prefer to work from the edges, using a long-handled brush. I am tall enough to reach the middle, but if you struggle, you might need to buy a longer or extendable soft-brush or even a floor-cleaning mop (one that you can squeeze out with its own lever is best, such as the Addis Superdry).
You could consider placing a board on the roof to spread your weight and climb up there, but again, safety must always be your first consideration.
After washing off the residue, you’ll soon see whether any dirt has stubbornly hung on. In such a case, a bit more elbow grease is required, and you may need to up your chemical attack too.
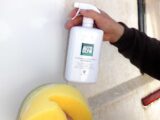
My favourite cleaners to use are Fenwick’s Motorhome Cleaner or Autoglym Caravan and Motorhome Cleaner.
After cleaning, rinsing and drying the roof, it can be worth using a polish or a ceramic protective coating product. One I particularly like is Autoglym Rapid Ceramic Spray – it may take a bit more work, but it’s well worth it for the next time you come to clean your motorhome.
In my opinion, cleaning around the seals on rooflight trims is going to be the most difficult job, because lichen and grime gather there. If you’re after a 100%-clean finish, you might need to get into these areas with a toothbrush, nail brush or scrubbing brush, but do take care not to damage the surfaces, and remember to wash away any strong cleaning chemicals.
Perspex rooflights can be washed with a soap-and-water solution, before being treated with a suitable window cleaner for plastic windows. I’m a fan of Fenwick’s Windowize, as it’s designed to get rid of hazing and any light scratches. Do make sure you rinse your cloth or brush carefully, paying attention for any grit or grime.
While you’re cleaning your motorhome’s roof, you can also give the solar panel some attention and use a cloth to spruce up along and around the cassette of your roll-out awning.
2. Cleaning the motorhome walls
Now, think about the sidewalls. These need soaking, with the wash-off from cleaning the roof hopefully softening any grime. I like to start with the cab and the rear panel, simply because they’re typically the muckiest.
To start, I soak the areas and get rid of the worst instances of road film by using a soapy detergent solution, accompanied by either a sponge, a mitt or a soft brush. Stick to a light, circular rubbing action – after all, you don’t want to inadvertently grind any abrasive particles into your motorhome’s paint.

Follow the instructions for the cleaning agent too – this can involve leaving the spray on the surface for a minute or two, so that it has time to act on the grease, grime and black streaks.
If the ‘van is especially mucky, it could be worth turning to the two-bucket cleaning process. Here, one bucket is full of clean water, allowing you to clean your cloth after it’s been used on dirt, while the second bucket is filled with your cleaning solution.
The purpose of this method is to lower the chances of getting any grit or dirt from the dirty water back onto your motorhome, so make sure your cleaning cloth only goes into the second bucket after it’s been carefully cleaned in the first bucket.
After rinsing this off, take a step back and decide if there are any areas which require some additional effort. This is where you’re likely to see black streaks making an appearance out of any protrusions. These are best tackled with products such as Autoglym Motorhome Cleaner – simply spray it on, give it a minute or two, and then, taking care, rub it off. From my own experience, I’ve found this to be the most useful product for tackling black streaks.
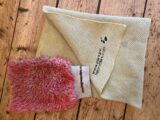
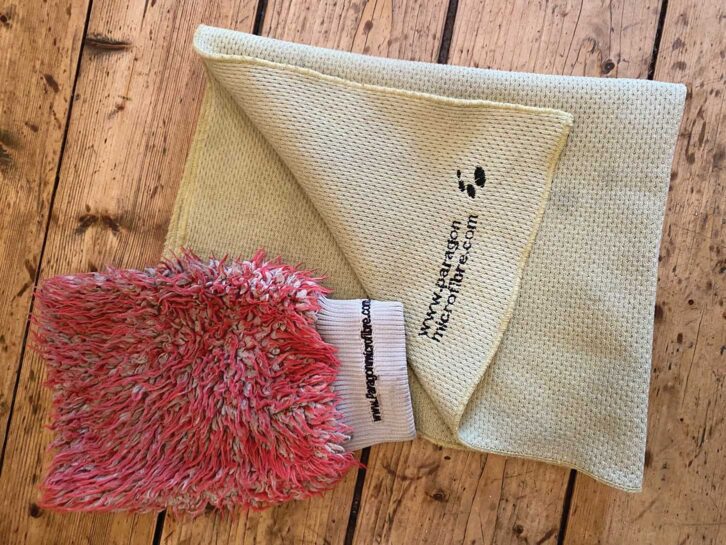
Give the front and side panels a rinse down, and then using a specialist drying cloth, a squeegee or a chamois, dry them off. I’ve always found my Paragon Microfibre Wash Mitt and Drying Cloth are up to the challenge. I typically use them at least once a week, and they’re still working effectively after nearly a decade.
By now, you should have a sparkling exterior for your ‘van’s walls. However, it’s still well worth using a polish. Adding a protective layer of polish to your vehicle twice a year will help to keep it in pristine condition, forming a barrier against bird droppings and sap, as well as making it easier to wash.
One I like is Autoglym’s Super Resin Polish – you can rely on it to protect your motorhome’s exterior and it has the additional benefit of going on and off quite easily, which, as anyone with experience in cleaning a motorhome will know, is highly useful.
3. Cleaning a motorhome’s decals and graphics
Take care to avoid using harsh chemicals when you turn your attention to your motorhome decals and graphics – otherwise you could inadvertently cause discoloration or fading. I’d also advise not cleaning too vigorously to avoid them detaching.

Instead, get a soft cloth or brush to clean the decals, alongside plenty of soapy water. An alternative I like is Erase Away foam pads – these non-abrasive pads not only contain no harmful chemicals, but are ideal for cleaning in and around raised decals.
4. Treating the chalky glass fibre
Over time, the protective top coat on older glass fibre panels can begin to degrade, leaving the material beneath exposed to UV damage and the elements. This means the material can start drying out, resulting in a ‘chalky’ appearance – this is the time to act.
Your response will depend on just how oxidised the exterior is. For instance, you may be able to get away with polishing it back to achieve a shiny finish.
In more severe cases, it could require a cutting agent to get rid of the dusty layer. One I like is Meguiar’s Ultimate Compound, as well as a rotary buffer with a wool pad.
After achieving a solid surface without any chalkiness, clear off the dust residue with isopropyl, and then buff the surface with a good wax to achieve a shine, with several applications to protect it. After this, you’ll need to polish the panel on a regular basis to avoid or minimise future oxidising.
5. Clean the seals
The seals around a motorhome’s hatch, door and windows will attract algae and muck. To deal with this, begin by washing them with soapy water and then let them dry.

It’s then worth using a silicone spray, such as Thetford’s Seal Lubricant, to ensure the rubber remains supple and avoids cracking. This will have the added benefit of offering protection against UV damage to extend its lifetime.
Don’t miss our guide to the care and repair of rubber seals if you need more tips on maintaining them too.
6. Cleaning the windows
Time to turn your attention to cleaning your motorhome’s windows! Wash the plastic windows carefully with either a loaded soapy mitt, a sponge or a soft brush, rinsing it out between applications. Once this is done, dry it with either a clean chamois or a soft microfibre cloth.
After general grime has been removed, I like to use Care-avan’s Acrylic Window Cleaner, which can be relied upon to polish and remove smears.
If you notice light scratching on your windows, try one of the fine-abrasive compounds designed to remove these, such as Fenwick’s Windowize.
When you’re turning your attention to the windscreen and mirrors, try Autoglym Fast Glass.
If you’re specifically looking to clean the windscreen, our guide to how to clean a motorhome windscreen will talk you through the steps too.
7. Cleaning the wheels
A specialist treatment such as Autoglym Clean Wheels should help you combat the mud, traffic film and similar grime that can coat your motorhome’s wheels. If you have alloys, it’s worth using a polish on a regular basis too.
8. Clean and protect the tyres
Getting a quality tyre dressing will not only clean but also protect the rubber of your motorhome tyres. I quite like the viscosity of a gel treatment, such as Meguiar’s Endurance Tire Gel, but the spray-on Autoglym Instant Tyre Dressing offers an appealing convenience too.
9. Furnishings and upholstery in your motorhome
Don’t forget the furnishings and upholstery either. Take your time checking over them, dealing with any marks or stains by using a suitable product such as Care-avan Interior Cleaner or Autoglym’s Interior Shampoo.
How often do I need to clean a motorhome?
Depending on where your motorhome is stored, two thorough cleans a year seems sensible: one at the start of the season, to remove the grime, streaks, sap and bird droppings accrued over the winter break, and another at the end of the season, before the ’van goes into hibernation, so that it doesn’t sit around for months with damaging or corrosive dirt on it.
Likewise, if you buy a neglected used ’van, these images show how a lacklustre grey box can turn into a gleaming white one with a dose of TLC and elbow grease.
Why is motorhome cleaning important?
Other than the very obvious appeal of driving, and living in, a pristine motorhome – and perhaps having a shiny white ’van, rather than a grimy grey one, on your drive – the time
and effort invested in keeping your motorhome spick and span will pay real dividends when the time comes for you to sell it on.
Keeping your home from home in better condition than most others on the market will help you bag a higher sales price. In addition, by looking after seals, locks and hinges, and so on, you’ll incur fewer repair bills.
As well as the obvious personal pride of owning a gleaming motorhome, you’ll also find that some storage facilities insist that the vehicles they keep are well cleaned and maintained. I guess that’s about standards and pride for them, too.
Lead image: Shutterstock
Future Publishing Limited, the publisher of Practical Motorhome, provides the information in this article in good faith and makes no representation as to its completeness or accuracy. Individuals carrying out the instructions do so at their own risk and must exercise their independent judgement in determining the appropriateness of the advice to their circumstances. Individuals should take appropriate safety precautions and be aware of the risk of electrocution when dealing with electrical products. To the fullest extent permitted by law, neither Future nor its employees or agents shall have any liability in connection with the use of this information. Double check any warranty is not affected before proceeding.
If you’ve enjoyed reading this article, why not get the latest news, reviews and features delivered direct to your door or inbox every month. Take advantage of our brilliant Practical Motorhome magazine SUBSCRIBERS’ OFFER and SIGN UP TO OUR NEWSLETTER for regular weekly updates on all things motorhome related.


